RIP Flappy Bird (2013-2014)
In May of 2013, Vietnamese programmer Dong Nguyen wrote the game of Flappy Bird in only a few days. It was published by a small game studio and soon had a following of over a million players worldwide. Flappy Bird reportedly earned $50,000 daily from in-game advertisement revenue. Unfortunately, its creator thought the game was too addicting and furthermore didn't like the pressure and media attention associated with developing such a popular game. In February of 2014 the game was removed from the iPhone and Android app stores never to be seen again ... until today!
Greenfoot Flappy Bird Project
Your mission is to write the game of Flappy Bird in about a week. Each day, there will be a video to watch. You are expected to follow along with the guided portion of the video and then finish the HW exercises on your own. There will also be optional extensions if you are thinking of taking APCS or just want to make a more sophisticated game.
Day 1
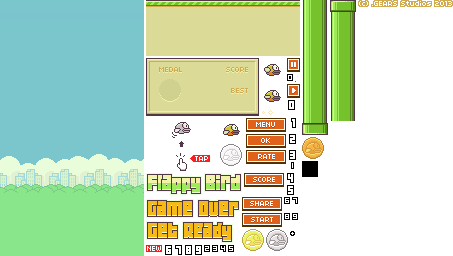
- Click here to download the project images. (Note: These images are newer and better than what I show in the video. They come from the Enhanced Graphics section between Day 5 and Day 6 below.)
- Click here to watch today's video.
- Day 1 Homework
When FlappyBird reaches bottom of screen stop the game and print "Game Over" to the console window using System.out.println("Game Over");
Hints: To stop game execution, look for a method in the API for the Greenfoot class. Go to the main Greenfoot window (where you play the game) and select Help | Greenfoot Class Documentation. Then select Greenfoot. Look for a function in this class that ends the game. To use the functions in this class, write Greenfoot.functionName(); - Day 1 Extension (Optional)
When FlappyBird reaches bottom of screen, stop the game and display a Game Over image instead of printing to the console.
Hints: You can do this many ways. Here's one way: Create a new GameOver actor using the "game over" image in the image folder. Next, inside your FlappyBird code, when FlappyBird reaches the bottom of the screen you should tell the World to add a new GameOver object to the center of the screen and then stop the game.
Want further detail? When FlappyBird reaches the bottom of the screen use the new keyword to create a new GameOver object and store it in a variable. Then use getWorld() to get the World you're in and tell it to add the GameOver object using the addObject() function. Finally stop the game using the appropriate command from the Greenfoot class.
Day 2
- Click here to watch today's video.
- Day 2 Homework
Implement yesterday's optional extension. (Shown in today's video.)
Change Flappy Bird's angle depending on velocity. (Hint: Look for useful functions inside the Actor class to change FlappyBird's angle.)1if(velocity is between __ and __) {2set Flappy Bird's angle to __3}4elseif(velocity is between __ and __) {5set Flappy Bird's angle to __6}7... etcFinally, modify all variables in FlappyBird until the motion feels smooth and accurate.
Day 3
- Click here to watch today's video.
- Day 3 Homework
When a pipe is created, move it so the top of the pipe is a random height between the bottom of the screen and somewhere above the middle. This is explained at the end of the video.
Define variable SPACE_BETWEEN_PIPES and add a top pipe this far above each bottom pipe as shown at the end of the video.
Day 4
- Click here to watch today's video.
- Day 4 Homework
Instead of displaying the score in the console window, tomorrow we will draw the score on the screen. See if you can do this on your own first. One possibility is to draw on top of a Score actor's image.
Day 5
- Click here to watch today's video.
- Day 5 Homework
Modify the Score font, color, and position to your liking.
Enhanced Graphics
- Sorry, there is no video yet.
- Click here to download the new images. (Note: These are the same as Day 1 since I replaced the Day 1 graphics
with the ones linked here.)
- (Optional) If you want all images from Flappy Bird, here are the sprite sheets. To use them, here are Photoshop directions:
- Click here to download sprite sheet 1 (original graphics)
Click here to download sprite sheet 2 (version 2 graphics) - Open sprite sheet and use the Selection tool to select a sprite you want. Crop it out using Image | Crop.
- Next, double its size using Image | Image Size. Make it double the width and height and select Nearest Neighbor (Preserve Hard Edges) for the resample algorithm.
- Choose Sava As from the File menu and save it in PNG format. Done!
- Click here to download sprite sheet 1 (original graphics)
Day 6
- Sorry, there is no video yet.
- Today, we're going to animate Flappy Bird. Here's the procedure:
- Declare three GreenfootImage variables in the global variables section of your FlappyBird class. Each image will be one animation frame (up wing, straight wing, down wing).
- Create a constructor for FlappyBird by adding a public FlappyBird() function to your code. Then initialize the images in your constructor using new GreenfootImage("filename").
- Add global variable: int animFrame = 1;
- Finally, add this logic to your FlappyBird code: Every act() step, increase the animCounter. Base the image used on the animation counter. Use setImage() to set the image of Flappy Bird.
- Day 6 Homework
Instead of hardcoding the animation rate, add a global variable to FlappyBird called ANIM_RATE, and use it to control the animation speed. If ANIM_RATE = 3, for example, switch to the next image after 3 act steps.
Memory management
- Currently, pipes are created off-screen and then instructed to slide to the left. But after a pipe has slid across the world and is no longer visible, where do they go? The answer is: they keep going. The longer you play, the more off-screen pipes there are taking up valuable memory space and processing power. Modify your Pipe code to remove pipes when they are no longer visible on the screen.
Day 7
- Sorry, there is no video yet.
- Today, we're going to add a title screen to Flappy Bird.
- On the title screen are two new Actors: A "Flappy Bird" title and a Start button. You can create your own images, pull them from the original sprite sheet, or download them here.
- Create an Actor for the title and another for the start button. Then add these both as global variables in your FlappyWorld code.
- Next, you need a way to have your program not act when the Greenfoot start button is pressed. To do this we'll add another global variable to our FlappyWorld: boolean isPaused = true;
- Look through your classes to see which Actors move during their act() functions. All of these actors (FlappyBird, Pipe, etc) must only act if the game is not paused. Add this to the body of each act method to make an Actor act when the game isn't paused:
if (((FlappyWorld)(getWorld())).isPaused == false) { - When the user clicks on the Start button, then remove the title and start button from the world and set isPaused to true. To tell whether the user has clicked the Start button, look in the Greenfoot class API for a function named mouseClicked.
- Day 7 Homework
Complete all items above so your program has a title screen and starts only when the Start button is pressed.
Flappy Bird Enhancements
- Sorry, there is no video yet.
- Choose FOUR enhancements an implement them:
Easy/Medium
- Add Sound
There's a class for this. Read the API for GreenfootSound. You should make background music looping and regular sound effects no looping. You should also make sounds global variables so they are loaded/created only once rather than every time the sound plays. - Pause
When the player presses 'p' the game pauses. When the player presses 'p' again, the game resumes. Accomplishing this is relatively easy once Day 7 is complete.
- Ground moves with pipes
Although limited in its usefulness, here's an easy way to do this: Use Photoshop to create several animation frames of the ground moving. Then use the same technique as you did for Flappy Bird to get the ground to animate. - In addition to pressing "up" to flap, enable mouse clicks to flap.
- Add other kinds of barriers
Perhaps add spinning barrier or a flaming wall to go around - Add powerups and bonuses
The sprite sheet has coins. Add them to your game for bonus points.
- Your own ideas
There are many ideas you can add that are easy/medium to program. Be creative. Add your own twist!
- Ground moves with pipes
Here are some better ways to move the ground.
(1) Have two ground Actors, side by side. When one ground actor slides off the screen, move it to front edge of the other ground actor. Repeat.
(2) Use Photoshop to find the repeat width of the ground. The repeat width is the distance in pixels between identical patterns in the image. When the ground object moves to or past this distance, you move it back only a little bit until it is in the exact same-looking place. In other words, the ground moves forward a little bit, then you move it back to a point that looks the same as it is now. Repeat. - Moving Pipes
You already have pipes moving horizontally. To move them vertically, have a counter variable and another variable called MAX_DISTANCE. Each time a pipe acts, you move it by counter amount until the counter reaches MAX_DISTANCE. Then you reverse its direction and move it until the counter returns to zero. Then repeat, going up to MAX and down to zero, over and over. - Pop up/down when die
In the official Flappy Bird game, and in some Mario games, when you die your character pops up into the air and then falls down off the screen. To implement this, you will need to something similar to what you did for pausing the game. But instead of pausing the game, the only part of act that runs is the ending animation. Give flappy a boost, then let gravity take over. - Two page start screen
After pressing the Start button, a second screen shows the "Tap" instructions before the game begins. Clicking anywhere on the screen then begins the game. Once the game begins, fade out the "Tap" image by changing the transparency of the Actors image using a counter. - Parallax background
Parallax is when multiple layers of the background move at different speeds. I have this working in my demo game. Accomplishing this can be easy to hard depending on how much hard-coding you do or don't use. I generalized scrolling to work based on specifying an images speed and repeat width. - Horizontal Flappy Movement
Although getting Flappy Bird to move horizontally is easy, getting your score to syncronize with the horizontal motion is not. So, be aware of this before beginning this challenge.
- Pipes open/close like a miniature golf castle door
If you completed horizontal flappy movement, this is a great feature to add. - Your own idea
There is almost no limit to what you can do. Add your own twist!
- Add Sound